Posts

Showing posts with the label stencils

Mini Canvas - Mixed Media

Image
This week I am departing on my scrapbooking cruise with Unmistakable Creations . We had been provided with a small mini canvas and easel to create a name tag.  We could use any technique and here is what I created. It will sit on our table in our conference room onboard. I wanted to try a something I had not done before, so off I went to internet to do some research and found Ranger Distress Glaze resist technique.  I must say I loved the result and I added a small cluster to top right so that I could incorporate my name and to cover up and area that I was not all that happy with. I used the following products: I sprayed the canvas with Dylusions Ink Sprays - Calypso Tea, Peony Blush, Vanilla Custard several times onto the canvas until I was happy with the result, drying in between and dabbing with a paper towel if too much water. Allow to dry. Note: I did not gesso the canvas beforehand. Next, I used Ranger Distress Glaze through a stencil in places on the canvas. I must conf...
Junk Journal

Image
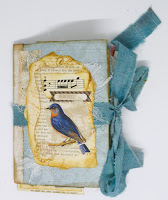
It has been awhile since I last posted - where does time go?  I recently developed and run an introduction to junk journals and embellishments.  I donated part of the small cost to the Community group where I lead classes for their mission efforts. Here are some photos of what I prepared for the participants.  The journal cover was constructed from one 12" x 12" (30cm x 30cm) folded into a smaller size.  My sample shows cotton fabric I coloured with distress and alcohol inks.  Students received tea dyed ribbon. Cover plate features cheesecloth and lace behind the main image - bird from a magazine. The journal on the right was completed by one of the participants in the workshop. We started with a simple tag seen on the bottom.  Next was a simple to construct belly band.  Clusters can also be made along the band and then cut off later for clusters to be used in the journal.  I love the simplicity of these bands that are great for decorating book pa...

Junk Journal Ideas and Inspiration - 20 day challenge

Image
I recently completed the April 20 Day challenge over at Junk Journal Ideas and Inspiration (JJII) on Facebook.  Challenge 12 was "It takes two to tango". In my case black gesso and texture paste are doing the Tango on tea bags. Here is what I created. Left is a greeting card (or page for my junk journal) and right is a small pocket and tag for my junk journal. I loved the idea of the pocket so went ahead and created 8 more as a table gift for a table I was hosting at a local fund-raising Afternoon High Tea.  I filled them with a tea bag (I found some that had a black top) and a roll of Mentos as a sweet treat. A small flower die cut (shortened to fit size of pocket) and a small adhesive word complete the pocket. Here is the process I followed.   I opened up used tea bags that I had dried and removed the tea leaves. Tea residue I put in the compost. Using a paint brush I coloured the tea bag with black gesso and allowed to dry, of course, I was impatient and got out m...

Word of the year

Image
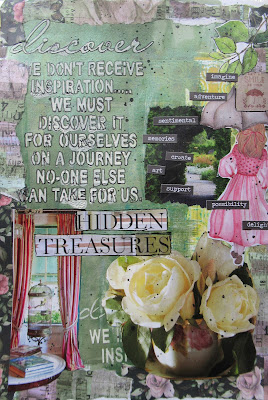
For Christmas I was given some money so I registered for Laly Mille's New Beginnings course on her website , and each year she selects a 'word of the year' and she suggested that we join her in selecting our own word of the year. Mine is DISCOVER. I have never been one who went in for this in past however I have found since doing Laly's on-line classes that I have expanded my horizons and put the inner critic to sleep!!! This is a single art journal page I created. I found the selection of my word did not come easy. I recently ordered several items from Natalie May Scrapbooking including the Scrap FX stencil I have used on my art journal page and this I felt this was the word that was 'calling' me, although I did not buy it for this purpose. Serendipity!  I also purchased Tim Holtz idea-ology Chit Chat stickers and I selected several I thought would help me on my 'discover ' journey this year.  I also used more pastel colours that I usually would use - s...

Easter card

Image
Last night I attended a local youth club and together they each created an Easter card to be given to residents at local retirement villages and others.   Here are the cards they created.  My thanks to my sister (mentor to the group) for her assistance and making card inserts to write their name. The card I designed for them uses a reverse stencil technique.  They first inked up Distress Oxide ink onto a craft sheet/acrylic block/plastic then sprayed with water.  Next, place the stencil into the water/ink and then lay it onto the white cardstock and then press to transfer the inks and dry with a heat gun.  The tag/cross I prepared for each card.  The cross die was a long ago free purchase with a magazine.  The youth enjoyed making their card for donation Thank you for looking, Margaret

Look layout

Image
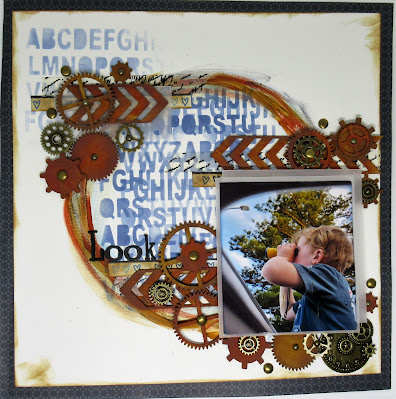
 I completed this layout today.   The designer of the layout was Natalie May (2017) and I purchased it in kit form - the kit included the paper, stencil, chipboard and hardware.   Everything else I used came from my stash. The photo is of my great nephew doing a spot of whale watching.  Thank you for looking, Margaret

Make it worth remembering

Image
Here is a layout I have completed today for the April challenge over at ARTastic challenges The challenge was to be inspired by this painting by Evelyn Chapman titled "French Ruins with Poppies". The criteria was Remembrance and to include the colour Red. The layout did not have to be Anzac themed.  I know as soon as I saw the inspiration it reminded me of a photo I took on Anzac Day 2020. First, let me tell you about the photo.  Australia was in lockdown due to Covid and therefore Anzac Day events were cancelled. No dawn services, no marches, nothing. People around the country held front garden sunrise services.  My 94 year old neighbour, Lorna, every year would donate to service clubs the Rosemary, from her garden, for patrons to wear - alas she could not do so in 2020.  She came to me and said what did I think of her putting Rosemary on the bricks at the front of our villas.  I said go for it - a great idea.  Later in the day, she came to me and said no-...

70th birthday celebrations

Image
In my last post I wrote that it was my sisters 70th birthday this week.  She has a lot of activities planned the first being an afternoon tea on 18th January with our brother and sister-in-law.  We went to Saddles, at Mt White.   I ordered the cake she wanted (and it was the most expensive cake I have ever bought!) and it was delicious.  Here is the layout I have created with her and the cake. We had this afternoon tea earlier than her birthday as our brother and sister-in-law were due to head toTasmania on holidays, however it was cancelled due to Covid restrictions at that time. So, we went ahead anyway and met up for a great afternoon tea. In my stash I found a previous watercolour and texture paste background I had created and it was just right for this layout.  The heart is a nod to the heart locket my sister is wearing.  It belonged to our mother and my sister recently had it cleaned and started wearing it again.   Yes, I did make a boo...

Simply Noted - Umina Beach

Image
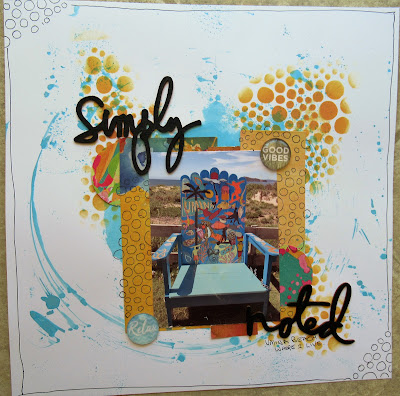
 I live in a beautiful area of New South Wales, Australia - Umina Beach.  Here is a layout I have created for Paper Issues (Friends and Fans) today.  I am going to put as #3 of 52 Friday Favourites. Danielle Dunlop was live on their facebook page with a challenge that she called 2021.  2021 you say - the challenge use 2 wood veneers (check - I used Heidi Swapp wood veneers); 0 was circle (check - got that covered - more later about that); 2 flairs (Check, okay, so my stash had no suitable flairs so I used 2 curios from Kaisercraft Paradise Found) and finally 1 use a stencil (Check one from my stash with ink and outline in pen). Now the circle story. I started out applying Distress Oxide Ink peacock feathers and water (that I had added some Perfect Pearl powder, onto an acrylic block and then smooching onto my white cardstock (CS).  I had a little more liquid than planned and I found that I was able to rotate into a circle movement on my CS.  A circle appea...

Norway Fishing Village

Image
I wrote yesterday that I was completing a couple of layouts for my sister of her recent holiday.  Here is the one I have completed for her of a fishing village in Norway (unfortunately at this stage I do not have the name but it was at the top of the Artic Circle). My sister will need to complete the journalling.   I used a sheet of Kaszazz paper from Indigo Blue collection (no biggie using this colour as blue is her favourite colour).   I have used 3 stencils and texture paste on the background - the grid is from Kaisercraft, adventure is from Gabrielle Pollacco called Wanderlust and the other words are from a favourite of mine by Tim Holtz. Chipboard is from Kaszass and I have coloured by first applying gesso over the words, then using diluted Spectrum Noir aqua pen Azure Blue and then I finished off with Glossy Accents over the word. The embellishments came from my stash of Kaisercraft papers and they added just the right accent I need to complete the lay...

Creativity is Contagious

Image
Here is a mixed media A4 canvas I finished yesterday. The canvas was designed by Melissa Kennedy and instructions were provided on our Unmistakeable Creations cruise to New Zealand in January... yes I have just got around to starting and completing it. Such fun to play with the techniques used. All products (except canvas) are from Kaisercraft  - Scrap Studio collection papers and stencils. Interested in doing a cruise, Melissa is the owner of Unmistakeable Creations   and has cruises covering scrapbooking, cardmaking and patchwork. Check out her link. Thank you for looking, Margaret

Guest designer ARTastic Challenges

Image
I am a guest designer over at ARTastic Challenges   this month.  The inspiration is this mixed media work titled Listen by New Zealander, Jenny Grant.  The criteria for the month was free choice, make of this what you will. Mixed media (according to Ebay) is loosely defined as any work of art that uses more than one medium.  I loved the colours, the writing you can see peeping through and that hair effect.  I am relatively new to this mixed media application for scrapbooking and initially I was what - 'scared' to put ideas onto paper. After deciding to use a brick stencil/mask, Impasto medium and Gelato's painted on after medium had dried and then sprinkled with salt.  I played around with three variations of these until I got the background I wanted. In this case a patterned paper already with writing and flowers on it and a thick layer of Impasto medium. I wanted to match the different clothes and hair colours of us all.   These are some ...