Posts

Showing posts with the label Ranger Distress inks

Artist Trading Cards - Use your stash

Image
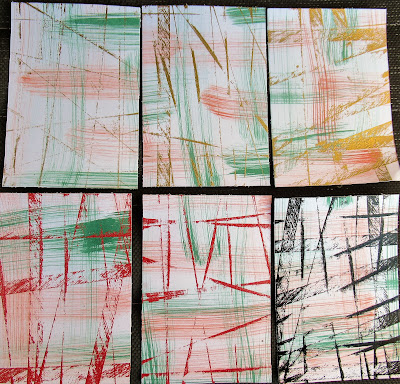
Here are the Artist Trading Cards (ATC's) I made for the April swap at Natalie May Scrapbooki ng. The swap was to make ATC's with theme "use your stash". I was required to make 11 ATC's to swap. This was the first time participating in the monthly ATC swap. Everything I used on the ATC's did come from my stash. But, first a little tale... I initially started with a piece of a sheet of heavy-duty white card stock that I believed was enough to make the required number of cards...well, it turns out I didn't I only had enough for 8!! What to do? Left the decision overnight!! I decided to cut up the eight I made into 1" strips and create new background.  What did I use? For original 8 cards I used layered techniques inspired by a virtual retreat I did with Seth Apter this time last year. For the new backgrounds I used the same colours I used for the above strips and sprayed onto the now 12" x 12" white cardstock.  I then applied gesso over this s...
Playing with ink and embossing powders

Image
I recently watched a video by a fellow Kaszazz consultant Julie Whitechurch where she demonstrated a great way to make to make your own backgrounds on paper.   Here is what I came up with Basically the technique using Distress Inks and Distress Oxide Inks applied to paper with a dry brush to create a checkerboard pattern (leaving white space) then embossing over the top using Embossing Ink applied with a ruler edge - see top right.  I then decided to use a ruler and the edge of an acrylic block.  Next, I decided that I would see what it looked like using Scarlet Distress Mixed Media Embossing Powder and Black Embossing Powder.  Love the result and when I do it next I will not leave as much white space.  I have left a thank you to Julie for the inspiration.  Check out her video, link attached above.  Now to make make into Christmas cards. Thank you for looking, Margaret

Simply Noted - Umina Beach

Image
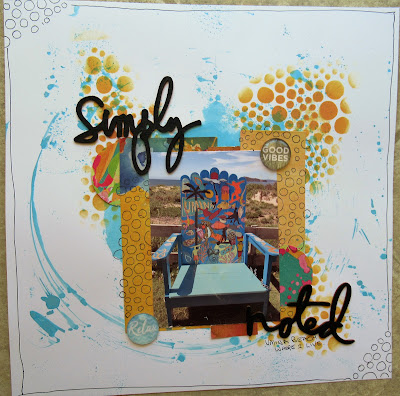
 I live in a beautiful area of New South Wales, Australia - Umina Beach.  Here is a layout I have created for Paper Issues (Friends and Fans) today.  I am going to put as #3 of 52 Friday Favourites. Danielle Dunlop was live on their facebook page with a challenge that she called 2021.  2021 you say - the challenge use 2 wood veneers (check - I used Heidi Swapp wood veneers); 0 was circle (check - got that covered - more later about that); 2 flairs (Check, okay, so my stash had no suitable flairs so I used 2 curios from Kaisercraft Paradise Found) and finally 1 use a stencil (Check one from my stash with ink and outline in pen). Now the circle story. I started out applying Distress Oxide Ink peacock feathers and water (that I had added some Perfect Pearl powder, onto an acrylic block and then smooching onto my white cardstock (CS).  I had a little more liquid than planned and I found that I was able to rotate into a circle movement on my CS.  A circle appea...

Quick cards - clean and simple.

Image
Later this week, my sister and I are heading to friends place for lunch.  I have decided to make 2 cards to say thank you.  Recently, trying to tidy up my stash I came across some paper that I had previously sprayed with Ranger Distress Inks.  So here they are being used.    I was inspired by a card I saw on Simple by Design , I have left a thank you on the blog.  The die was part of a give away in magazine in 2014.    Thank you for looking. Margaret

70th birthday cards continued

Image
 Recently , I posted a photo of a card I made for a friend who is turning 70 this month.   I loved it but did not think it right for my friend.   So, I have created another one for her.   This one is a little more feminine.                                           I changed up the embossing from black embossing powder to the white and added a bit of lace and pearls.   The inks are again Ranger Distress Inks but this time in softer colours.    Inside, I added my greeting and a few things about the number 70 that I searched for on the internet: 70 years 840 months 3,652 weeks 25,567 days 613,607 hours 36,816,444 minutes 2,208,986,640 seconds *** 70 is only 13 in Scrabble *** Turning 70 is like turning, 21 in Celsius. *** Thank you for looking, Margaret Happy birthday to everyone who has a birthday in December.

70th birthday card

Image
 Here is another 70th birthday card I have created for a longtime friend who celebrates her birthday in December. As soon as I saw this Kaszazz stamp - Scholar - I knew I had to purchase it to make her card.  Her career as a Secretary and typist started when we were both teenagers working for a major bank here in Australia.  The Happy Birthday stamp is also from Kaszazz Word Montage - Be Yourself.  The background has been coloured with Ranger Distress Inks. The card is sparkly, just does not show up in the photo as I sprayed it with pearlised water. Some sequins and stickers (both from my stash) completed the card. Thank you for looking, Margaret. 6 December, 2020  Just letting you know that I have decided that this card was not suitable for my friend..   I have made a more feminine version: It is great to see that the Scholar Stamp also looks great with white embossing powder. Thank you, Margaret

70th Birthday card

Image
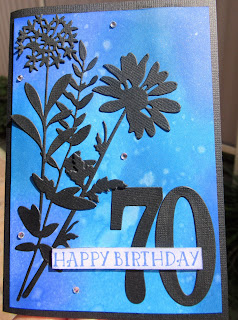
Here is a card I have made for a friend who celebrated her 70th birthday this past week. I used Distress Inks (in my friends favourite colours) to create the background and a spritz of water with Pearl powder in to give it a sheen - unfortunately this does not show up just how shimmery it was in the photo.I then die cut flowers and 70 and attached to card along with the Happy Birthday greeting.  Lastly I added some sparkly rhinestones. Thank you for looking,  Margaret

Playing with Distress Inks

Image
It seems that Ranger Distress Inks are now the poor relation to Ranger Distress Oxide Inks. I love them both.  So time to get out the Distress Inks and use them in cards for today's classes.  Take any embossing folder and apply distress inks in a random manner. As you can see the embossed layer is smaller than the black mat behind it - intentionally.  As, after you have finishing the inking you cut that panel on an angle and place onto the black mat.  In the space between, I have applied a happy birthday die cut that I coloured with one of the Distress Inks.  A few drops of pearls (or rhinestones) complete the card.   Whilst I had the inks out I also played around with applying the Ranger Distress Ink through a stencil and then attaching a die cut and greet.   All products are Kaszazz and Crafters Companion (some retired product).  A great way to use up scraps from your creating. So quick and easy with great results.    Thank y...

80th birthday card

Image
I was asked to create a card for lady celebrating her 80th birthday.  I was told that chrysanthemum was her favourite flower and her birthday was in November. Here is the card and box envelope I have created: As can be seen in the photo below, there are many layers to the main flower. Interestingly, my google search revealed that the chrysanthemum is the birth flower for November.  I never knew that! This card uses supplies from a many sources: Kaszazz - Leaves embossing folder, papers, pearls and envelope punch board. Stamp and die from Altenew - Build -a-flower: Chrysanthemum Ranger Distress Inks: Spun Sugar, Tattered Rose, Victorian Velvet and Aged Mahogany for flower and Bundled Sage, Peeled Paint and Forest Moss for the leaves.   Spun Sugar and Bundled Sage were also 'smooched' onto background and box card. Also available from Kaszazz. Stampin' Up - Number of years stamps and die (retired) Thank you for looking, Margaret. Fun quote: "Why don'...

Sunset layout and card

Image
This past weekend Kaszazz introduced 2019-2020 annual catalogue. In my previous post I shared with you my cards that were published in the catalogue. Our Kaszazz group had a retreat on the weekend and there was a challenge to create a project using one or more of the specialised papers that we have - tissue paper, acetate, glimmer paper and watercolour paper.  Here is my entry: The photo of the sunset was taken at Ettalong Beach on 12 June this year and I had it printed and sitting on my shelf since then just looking at that marvelous sky. All products used are by Kaszazz. After playing and trying out several ideas, I finally looked at my photo once again and thought I could do a layout and card using my photo for inspiration. I used tissue paper that was scrunched and then straightened out. I then applied to white cardstock with multi-medium gel.  After allowing this to dry I applied Ranger Distress Inks Black Soot, Mustard Seed, Spiced Marmalade and Stormy Sky.  ...

Little works of art

Image
I have just returned from a scrapbooking cruise, with Unmistakable Creations , leaving Sydney and arriving in Auckland 10 nights later.  Also, my sister and I spent 4 more days in Auckland before heading home.   One of the highlights of the cruise is making little 4" x 3" cards that are exchanged with others in our group.   Here are mine: I used glossy paper, Ranger Distress Inks, and Ranger Micro Glaze. See my earlier post on how I created the backgrounds - magic!  Stamps and stencil I have used are all available from Kaszazz.  Here are just a few of the 30 plus I created.  All different - amazing.  Close up of a couple Close up of a couple more. My sister also came on the cruise as part of the scrapbook group and here is the card she created. She was looking for ideas and found a card in the current Kaszazz catalogue by Alannah May and together we came up with this card for her - again she needed to make 30 plus.  Again all pr...

Create fun and laugh

Image
Here is a layout I have created for a challenge over at Soul Scrappers .   This time it was a Pick 3 challenge but first my layout: The photos were taken at a team weekend away, in September, for the Kaszazz team of which I am a part of. Lucy our team leader was not in these photos as she was behind the camera. We stayed in a townhouse in Toukley on the shores of Tuggerah Lakes, north of where I live.  On seeing all the seaweed on the beach in front of the townhouse the idea was struck to create Kaszazz on the sand with the seaweed. And then there was an idea to have us create the letters of Kaszazz - well that created much laughter as we just could not seem to get it just right! This clean and simple layout uses all products available from Kaszazz. Yes, I am a consultant. Thank you for looking, I hope to get more time in next few weeks to complete more scrapbook layouts. Margaret :)

Fun with Distress Inks

Image
Here is the card that the ladies that I lead for cardmaking in a local community group made using the Distress Ink technique I featured on my last post. Instead of the wood veneer shown here, the I gave each of the ladies used a chipboard bauble. And, here is another one I created.  I have used a Kaisercraft die for the embellishment. These are such fun to make and the ladies really enjoyed making their own colour creations. Until next post, have fun creating whatever you do - cardmaking, scrapbooking, sewing, patchwork, quilting etc etc.  Margaret :)

Getting my art journal on

Image
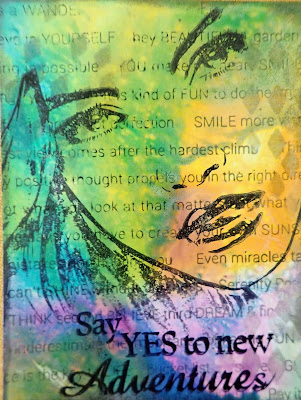
I am having a few days relaxation in Forster, NSW. My sister is here also and she has headed up to Grafton overnight to visit friends.  I have taken this time away to finally get a few pages done in my art journal. Here they are: I came up with limited supplies - Ranger Distress Inks, Dyan Reaveley stamps and stencils, and a box of coloured pencils.  They all got a good use on these pages. I am happy with the results. My sister was intriqued as I created and as a result she started her art journal...a small travel journal....inspired by my first page above and other techniques that I showed her. My advice to anyone thinking of starting an art journal.....just do it!   Colour outside the line, mix colours, don't worry, have fun. Thank you for looking, Margaret. 🤗🤗🤗

On the surface.

Image
It has been so hot here, so why not stay indoors with the air-conditioner on and complete some layouts and cards for upcoming classes and workshops. This layout is for a Kaszazz workshop that I am leading in April - I know so early.  The ladies wanted a double page layout suitable for boys or heritage.  All Kaszazz product used. I was inspired by a single page layout by Lisa Bridgeman, Kaszazz consultant.  She had her layout published by Kaszazz however it was not current as hers used discontinued product.  Thank you Lisa for your inspiration.   Lots of Ranger Distress Ink, stamps and even some words from a stencil - Strength and Discover - I first sponged with Spiced Marmalade ink and then put the stencil back over the work and slightly to the right and this time used Vintage Photo ink to give a shadow effect. Thank you for looking, Margaret.

Class cards and remember everything old is new again!

Image
I wanted to share with you some cards I have designed recently for a card class I lead each Friday for a local community group. These two cards were made using handmade paper, distress inks (run across a clear block and then spritzed and applied to the paper) and a mixture of stamps I found in my stash.  I love them - the way that the distress ink reacted with the paper is 'magic'. This card uses a Darkroom Door stamp of the lady. Other embellishments were from my stash. This reminds of the old Ladies Home Journals that my mother, a dressmaker/tailor,  collected - they contained pattern paper of some of the clothes in the magazine.  I remember as a child being mesmerized by the images of film stars and their stories, the clothes.  Background paper was old pattern paper that I have collected over the years. In a recent post I share how I made a scrapbook layout using the technique of what I am calling faux watercolouring - I just new it would work on a ca...

More cards for children

Image
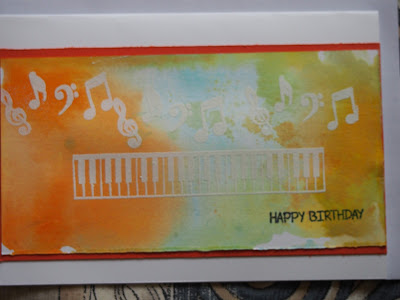
Earlier this month I posted some photos  of cards I made for a local Making Music group.  I have had fun creating some more and here are two cards made using distress inks and white embossing powder. The stamps came from a give away in a magazine and I thought to myself at the time - I will never use these.  It just goes to show 'never say never'. These cards could be used for either a boy or a girl, what do you think? Thanks for looking, Margaret :)

It is hot, hot, hot

Image
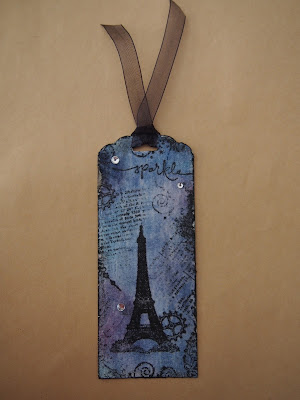
Today, I am sure there will more weather records broken, so hot at 6am and just getting hotter.  No better reason that to be staying indoors with the air-con on (I am lucky to have it and will just pay the bill when I get it!!)   I have been playing along with CreativeKady  who has been creating tags. The first in her series was to make your own tissue paper.  My finished tag: First you need tissue paper (I did not have any white and I was not heading down to shops to get any in this heat) so another option was to use the second ply from a dinner napkin.  Then gather stamps together and using black waterproof ink stamp randomly,  Then select portion to use, apply to tag using matt gel medium.  Let dry. Finally, I sponged on Ranger Distress inks to colour my tag. After I tidied up the edges I ran a black Gelato around the edges and smudged with my fingers.   I did apply a layer of Faber Castle Glaze on top (and boy did tha...

Christmas Card Variety

Image
Here are a few Christmas cards I created for a class I lead at a local community college. This was first one I played with - using distress inks. I did not end up going with these colours for the ladies and stuck to more conservative Christmas colours for the one below.  This card using stamps that were 'freebies' in a Papercraft magazine this year.  I went with the gold embossing to create this elegant card. Tonight I am heading off to lead a class in a completely different craft.  Stay tuned for photos. Thank you for looking.   Margaret :)  

Clean and Simple Cards

Image
A couple of cards I have made recently.  The first, below, is a technique called "Cracked Glass".  Now, I first saw this done many years ago, it one of those techniques that I kept on the back burner, I tried several times to get a result I was happy with.  This card I am happy with!!!  Glossy paper, distress inks, low tack tape and cotton balls to apply the coloured ink and a few stamps.   The card below is super, super clean and simple - bubble wrap inked up and applied.  How easy is that!  You could vary it by using another colour ink with it or even cut the bubble wrap into a heart, oval etc etc. Thank you looking. Have a great weekend, Margaret :)