Posts

Showing posts with the label mixed media

Does my face look long!

Image
The weekend I am participating in an on-line virtual retreat with Hillbilly Scrappin"  called Do you see what I see (DYCWIS). I have signed up for several of the classes.  Here is a journal page I have created with a class led by Marlene of ART BY MARLENE (ABM). A little out of my comfort zone - but hey need to do that sometimes!   Mostly using paints and pencils from my stash.  I did use ABM Paper Pad Multi Color Madness (ABM-26-DPP417) and ABM Sticky Multi Glue 28ML - all available from Hillbilly Scrappin'. We were encouraged to free-hand draw our options for how we would tackle this - Marlene provided some examples in her video.  Well, all I can say is I could not draw regular looking faces - below see how I started off - scary stuff!!!  I was inspired by a kid's You-tube!! On the right I tried another drawing same as the first by cut down middle! Scarier!!!   So, I was not happy - so I went with geometric shaped face and features!  ...
Taster Workshops at make create express 2025

Image
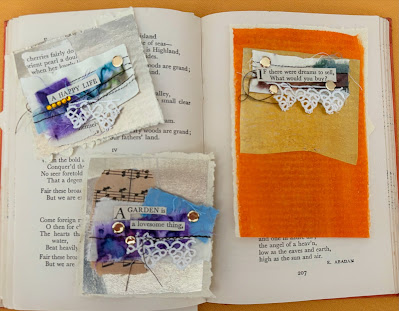
This weekend I have been watching and creating with talented artists, from around the world, in Free Taster Sessions.  Here are the results of two classes I completed. From a class with Meaghan Early - Fabric Found Word Clusters.  My words were found in an old poetry book and I found myself reciting the poems as I searched for just the right word. This was a class with Lisa Goddard - Affirmation boxes in fabric and paper. This is the front the matchbox (available, if you live in Australia at Spotlight in a pack of 6) - all sides were decorated. I have also used gesso, paint and charms.  Slide the drawer up and here is the middle. Also shown is the back of the box. I have created this box for a friend who is celebrating a milestone birthday and tomorrow we are meeting for lunch - this will be her birthday 'card'.  Rather, than create a specific birthday theme I decided to go with a box that could be opened any day of the year.  I will be making more of these - as...

Art Journal play

Image
 This is a small 2" x 3" (5.3cm x 7.8cm approx.) journal I have made this past week: Inside and back pages, using stamps, doodling, acrylic paint pens, punched circles, fussy cut images. They are a work in progress that I can come back to at any time and play more. Why so tiny? Sometimes when creating opportunities arise and you change course. I started with a 12" (30cm) of 350gsm white cardstock (CS) and an A4 sheet of white CS - that I sprayed with 4 spray inks in my stash. Allow to dry completely - I left overnight to dry.  Then in the morning I cut, the larger sheet into 6" x 4" pieces. These were than to be folded in half.  All good so far, for the first 6 pages and then for some reason I cut the remaining 6 pieces in half ending up with 12 pages that are sized 2" x 3" - no worries I love mini journals. A couple of photos Spray inks on the A4 sheet - of course, by this time the green spray decided to run out!  The other 2 journals I created - now...

and now for something different.

Image
 Have you heard of paper netting?  I came across a video by Francisca Nunes where she explained and demonstrated her technique. Here is an art piece I made for a warm up challenge at Hillbilly Scrappin' for the upcoming virtual retreat.  This will be a long post - I hope you stay with me. I had not heard of this technique, and it reminded me of when I made patchwork quilts (the stitching of course). The paper here is a page from The Country Diary of Edwardian Lady by Edith Holden  I placed onto a paper bag, which I have left open as I intend that this will be a cover for a junk journal - cardboard can be tucked into the bag to make it more rigid. Now, I got to this by experimenting and I have included my inspiration  Many years ago, my sister gave me an old hexagon quilt top she had found - I would say probably fabric from the 1960's.  It has sat in my quilt collection for many years and as soon as I saw this technique it reminded me of the quilt. A few pho...

Mini Canvas - Mixed Media

Image
This week I am departing on my scrapbooking cruise with Unmistakable Creations . We had been provided with a small mini canvas and easel to create a name tag.  We could use any technique and here is what I created. It will sit on our table in our conference room onboard. I wanted to try a something I had not done before, so off I went to internet to do some research and found Ranger Distress Glaze resist technique.  I must say I loved the result and I added a small cluster to top right so that I could incorporate my name and to cover up and area that I was not all that happy with. I used the following products: I sprayed the canvas with Dylusions Ink Sprays - Calypso Tea, Peony Blush, Vanilla Custard several times onto the canvas until I was happy with the result, drying in between and dabbing with a paper towel if too much water. Allow to dry. Note: I did not gesso the canvas beforehand. Next, I used Ranger Distress Glaze through a stencil in places on the canvas. I must conf...

A book of Whispers

Image
I recently completed an on-line course with Laly Mille called "A book of whispers".  Here are the photographs of each page.  It turned out a bit more 'clunky' than I intended but I love it. First time doing the book binding - don't think I will be coming out of retirement to be a book binder! Have you read the novel - Bookbinder of Jericho by Pip Williams? To quote a blurb on the novel "The Bookbinder of Jericho is a story about knowledge - who makes it, who can access it, and what is lost when it is withheld. In this beautiful companion to the international bestseller The Dictionary of Lost Words, Pip Williams explores another little-known slice of history seen through women's eyes. Intelligent, thoughtful and rich with unforgettable characters." Thank you for looking, Margaret

Junk Journal Ideas and Inspiration - 20 day challenge

Image
I recently completed the April 20 Day challenge over at Junk Journal Ideas and Inspiration (JJII) on Facebook.  Challenge 12 was "It takes two to tango". In my case black gesso and texture paste are doing the Tango on tea bags. Here is what I created. Left is a greeting card (or page for my junk journal) and right is a small pocket and tag for my junk journal. I loved the idea of the pocket so went ahead and created 8 more as a table gift for a table I was hosting at a local fund-raising Afternoon High Tea.  I filled them with a tea bag (I found some that had a black top) and a roll of Mentos as a sweet treat. A small flower die cut (shortened to fit size of pocket) and a small adhesive word complete the pocket. Here is the process I followed.   I opened up used tea bags that I had dried and removed the tea leaves. Tea residue I put in the compost. Using a paint brush I coloured the tea bag with black gesso and allowed to dry, of course, I was impatient and got out m...

Art Journal Dreams online retreat - Bonus Day 4

Image
We were treated to a bonus day to Laly Mille free online retreat.  Laly Mille shared one of her favourite ways to quickly create a page by combing an intuitive background with a meaningful photo.  Here is my art journal page inspired by Laly. I did not have a photo that I wanted to use so I went with a window print from a magazine. I find myself more and more drawn to 'windows' they let in light, you can imagine what is outside or inside! I used colours, which is not usually my "go to" colour choice.  I used Dylusion Sprays, acrylic paints, gesso, watercolour pencils, fabric and paper.  These pages are definitely a work in progress and I may add or remove other elements in the future. Thank you for looking, I had a blast. A big shout out to Laly Mille, follow her and be inspired. Margaret

Art Journal Dreams online retreat - Day 3

Image
Day 3 on Laly Mille's online retreat was finishing touches.  In the words of Laly "Finishing touches are such a magical part of the process! Get playful and try new things, infuse more light, color and contrast into your page, and find that special touch that makes your art unique!".  Here is my finished art  Up early this morning to complete this outdoors, as I started on Day 1. We are expecting record high temperatures today 40c and we are in Autumn/Fall!  If I have a problem area it was the trees added - lesson learned for future pages I think.  What this photo does not show that there is a lot of sparkle and glittery aspects to this page. I hope the following bits from the page show that.  Laly in her video for Day 3 said we would be looking at the magic of the page and that art journalling is the experience of creating. A British informal definition of 'magic' I found online was 'Wonderful and Exciting" and that is how I feel after completing this wo...

Art Journal Dreams online retreat - Day 2

Image
Day 2 of Laly Mille's on-line retreat saw us working on our Day 1 layouts.  I drew and coloured some naive flowers along the top of the green gills (might need more of these).  I found the tree images in a magazine, tore them out much smaller (the one on the left might need a bit more added, but I will worry about that later) than original and placed in the centre.  The Tim Holtz wildflowers I had in my stash from card classes taught previously and just could not throw away!  What else have I done today - painted the sky area more and generally dulled the paint I added at the top and between the trees to give the appearance of walking through the trees.  The stars/fairy lights light up the sky (I hope)! I have always had an interest in the vanishing point in paintings so let's see what tomorrow brings as we finish up our art journal page.  Thank you for looking, Margaret

Art Journal Dream online retreat

Image
For the next 3 days I am participating in Laly Mille online retreat - Art Journal Dream. At the end will be a completed double art journal page. Here is my Day 1 layers - more to be added in the coming days. Here is my process - I hope you get a sense of what the retreat is all from this starting point. I first selected the first 2 pages in my art journal - I usually move all around the place. I chose it because it had marks from previous entries down the centre line.  Laly's usually encourages writing for first layer - she uses marker pen I was not so brave I used pencil.  I am seriously thinking about travel to USA next year and so I wrote down some of my thoughts about this.  Don't worry they are covered up eventually.  In past workshops I have been reluctant to write and did move to putting a few words down but today more words than I have incorporated. The next layer was to take colouring medium of choice and create deeper colour at bottom of pages. I went with ...