Posts

Showing posts with the label shabby chic

Shabby Chic Birthday
Image
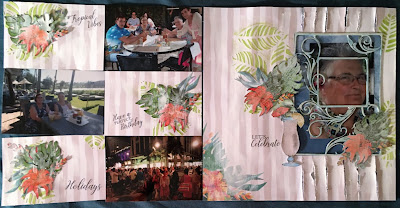
In my post yesterday I shared a single page layout I had created.  I have now added a pocket page to make it a double layout. Close up of the pocket page.  Photos from top right - enjoying dinner, enjoying lunch, enjoying Pearl Harbour parade after dinner.   Isn't that what holidays are all about - enjoyment!  Close up of the main layout. Once again, I have used Kaszazz Resort Collection stamps and papers.  All products used are available from Kaszazz and yes, I am a consultant. Thank you for looking, Margaret

Let's celebrate

Image
Here is a shabby chic layout I have completed.  The photo was taken on my birthday in December whilst in Hawaii.  I have used papers and stamps from Kaszazz Resort collection and all other product used is also Kaszazz.  I started by laying the frame, without any adhesive, onto the striped paper and using pencil marks to indicate where it would lay.  I then cut strips to each of the marks and distressed the edges. See below. A half sheet of blue Designer Paper was then placed behind the distressed edges. The next step was to mix a small amount of Leaf Green Archival Ink into texture paste and then apply though Leaves stencil.  Moving to different angles as I progressed.  I also lifted some of the texture paste from areas between each leaf. For the Flourish Frame I first used white embossing powder (note I did emboss it twice). and then I applied Broken China Oxide Distress ink and then whipped over with a tissue to get affect. For the Flourish Frame ...

Welcome to my 800th blog post!

Image
Yes 800 posts! I do not know if anyone reads blogs these days but I like to post as a  journal of my papercrafting journey. I was recently asked to see what I could do with some old unused wooden stamp mounts.  Here is what I did with them.  This is just a small portion I have completed more. I scoured Pinterest to find ideas on what to do with the blocks and these are the results of looking a many sources of inspiration.   Firstly I got a friend to put the screws on top.  Then used black gesso to coat the blocks.  The watercoloured paper was from previous experiments I have done with watercolouring  with a bit of dry white gesso added to soften.  Then added some lace and bits and pieces and then white gessoed chipboard and applied with gel medium.   Used up ribbon I had in my stash to complete. Here are a few of the above up close and personal! I love them and I hope readers you do as well.   They are off to fete craft st...

Christmas Cards continued

Image
Another challenge at Soul Scrappers this time to add a bauble to your card.  Here is my card: My card is very shabby chic looking.  I have used various stamps I have in my possession.  The ribbon on the side I have sewn a straight line with a running stitch -- not paying attention to the fact that each stitch was a different size, gathered and then attached with tape. Non-traditional colours used. Thank you for looking, why not head to Soul Scrappers , join up and make some cards. Cheers, Margaret.

Mixed Media Shabby Chic card

Image
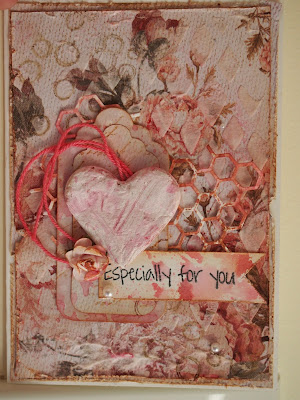
I was recently asked to lead an advanced cardmaking class, and my mind immediately went I want to do a mixed media card.  It take the participants 1.5 hours to make the card below: Ingredients: Kaisercraft Sage & Grace papers, Tinby Designs Color Crush Raspberry as a spray, heart handmade with paper pulp and painted with white acrylic paint, Stampin' Up! embossing paste through a mask of their choosing, Distress Ink and stamping completes the card. For the heart I punched out a heart onto white cardstock and then applied the paper pulp with my fingers allowing it to dry overnight.  I did make all them before the class.  The ladies got to make a smaller one on the day to use later at home when it had dried. I was inspired by a card I saw in craft stamper magazine February 2016 made by Mona Pendleton and I have emailed her to thank her for the inspiration. This card has multiple layers and requires lots of drying in between each layer - the ladies loved it and for...

Covered notebooks

Image
I was recently asked to lead a class in covered notebooks.   It was for a fundraising event and all proceeds from the night are donated to an identified charity.   Here is the notebook I designed. Lots of shabby chic elements on it. The ladies enjoyed making it and I have been asked to run the class again in August, as so many people saw the ladies making it on the night that they too want to make one.  Thank you for looking, Margaret :)

Recycled Treasures

Image
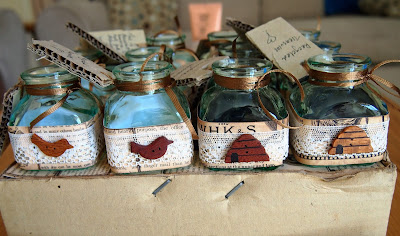
An urgent call out was given for craft goodies for a street stall this Thursday, to raise funds for a school in Kenya.   Here are some decorative bottles I put together this morning.  My sister had the bottles (they are about 2.5" in height and width), maybe old ink bottles that we got from a recycled place here on The Coast.  I have used wooden buttons, papers, lace and ribbon from my stash with some distress ink to age the edges.   Close up - there is six of each design. The bottles are a green colour. Aren't they cute!!!  Thanks for looking,  Margaret.

Decorative jar/vase

Image
Earlier today I made these cute little decorative jars/vases - shabby chic/vintage style from some small bottles I had (they are about 7.5cm/4" tall).  I decorated them with a paper band, some lace, ribbon, twine and a charm.   I did ink the edges of the paper with Tea Dye Ranger Distress Ink.  The charms I have had for years. Too cute, don't you think.   These are being donated to raise funds for a local church that my sister attends.  The crocheted doily (from a set) was made by an aunt for my 21st many, many years ago and I still use them to this day.  Not longer after finishing these a headache was upon - and no not as a result of making these!!!

ARTistic Challenge

Image
I came across this blog whilst out blog surfing one day and I was immediately drawn to the criteria at ARTistic Challenge - the use of recycled material to feature prominently on your work for their June Challenge. So I had a go! My sisters decorating style is shabby chic/French Provincial and so I have tried to capture these on the layout.  Many years ago whilst in US I purchased a bag of Bits of Inspiration - the bag contained bits of paper, antique labels, funky scraps, old postage, bit of metal and more! And I have used many of the bits on this layout. I laid the paper onto the backing from an old packet paper of Stampin' Up! - I would normally throw this out.  The Shabby Chic tag and pink ribbons are from some goodies she purchased on holidays this past month, the pin was from a clothes tag from a top I purchased this month, and a single diamante earring I had has been added as well.  The reference to Paris on a number of ...

Distressed Shabby Chic

Image
cards (c) Bianca Clarkson - Princess Bee's Designs - Classes at Fantasia. Yesterday, I made these cards at a workshop at Fantasia , Bella Vista. Lots of good techniques. Today. it is a beautiful winter's day here in Sydney,plenty of sun - I have really got my creating mojo happening - I have made some scrapbooks for SCKC (South Coast Kids Camp) and some christmas cards for Aussie troops overseas. I really need to get some photos of my holidays printed and start scrapbooking my holiday.